How to Change GitHub Branch From Master to Main⚓
Summary⚓
In June 2020, GitHub began a process of gradually renaming the new default branch of a repository from 'Master' to 'Main'. This is in line with the culture shift in tech that's moving away from using divisive language. Although it may not seem like a big deal to make the change, there are a number of reasons not to. The biggest reason is that renaming the branch will not automatically redirect any commits to the new name. Git commits will fail because they will, by default, look for the old 'master' branch.
This article will describe how to seamlessly rename the master branch and have it propagate to your code editor automatically. Something to note is that GitHub is already working on making this even more seamless. Details on that can be found here.
This article will be a copy/paste of the steps taken from the following site:
https://stevenmortimer.com/5-steps-to-change-github-default-branch-from-master-to-main/
Step-by-Step⚓
Step 1 - Move the ‘master’ branch to ‘main’⚓
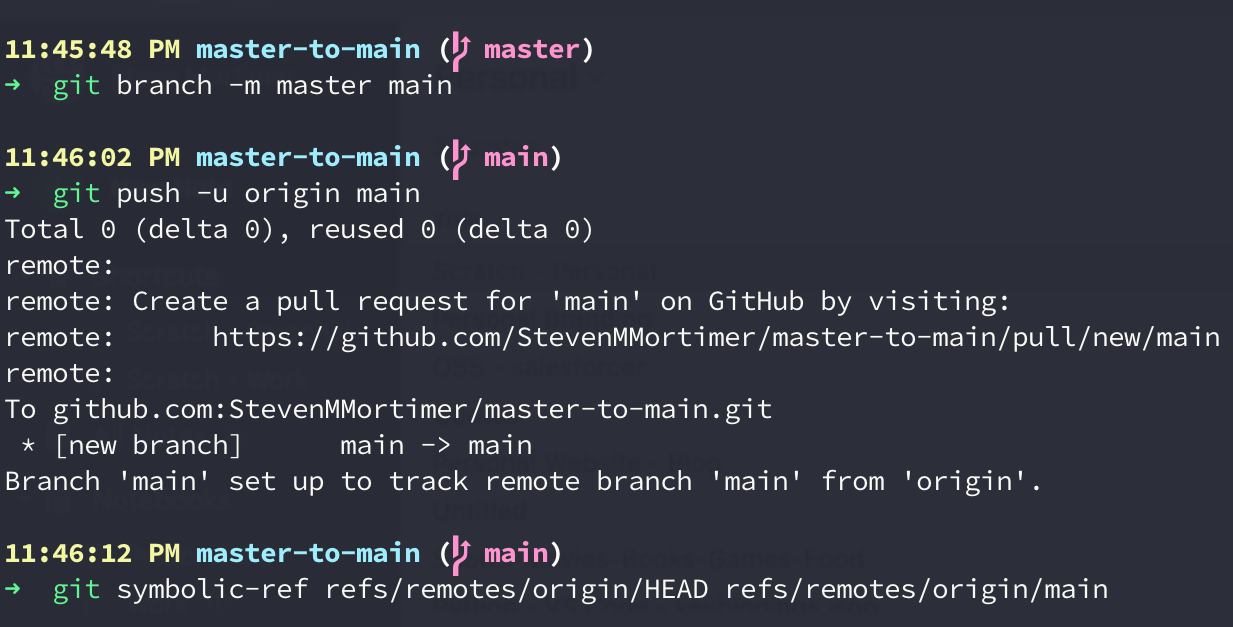
Run the following command which creates a branch called ‘main’ using the history from ‘master’. Using the argument -m will transfer all of the commit history on the ‘master’ branch to your new ‘main’ branch so nothing gets lost.
Step 2 - Push ‘main’ to remote repo⚓
Remember that git is version control software on your local machine and GitHub is the remote server that stores your code. For this reason, you’ll have to push your new ‘main’ branch up to GitHub and tell the local branch to start tracking the remote branch with the same name.
Step 3 - Point HEAD to ‘main’ branch⚓
At this stage if ‘master’ was your default branch you cannot remove it without first changing HEAD, the pointer to the current branch reference. This following command will point it to ‘main’.
All three steps are shown in the screenshot below:
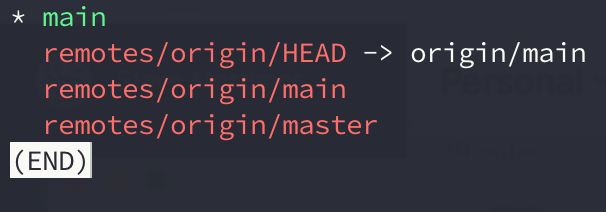
If you want to check that things are going as planned, then you’re welcome to run the following that should show the HEAD is pointing to main which now frees you up to delete ‘master’. Note: When you enter this command in your Terminal you will have to type :q to exit it. Not CTRL+C, ESC, etc.
Step 4 - Change default branch to ‘main’ on GitHub site⚓
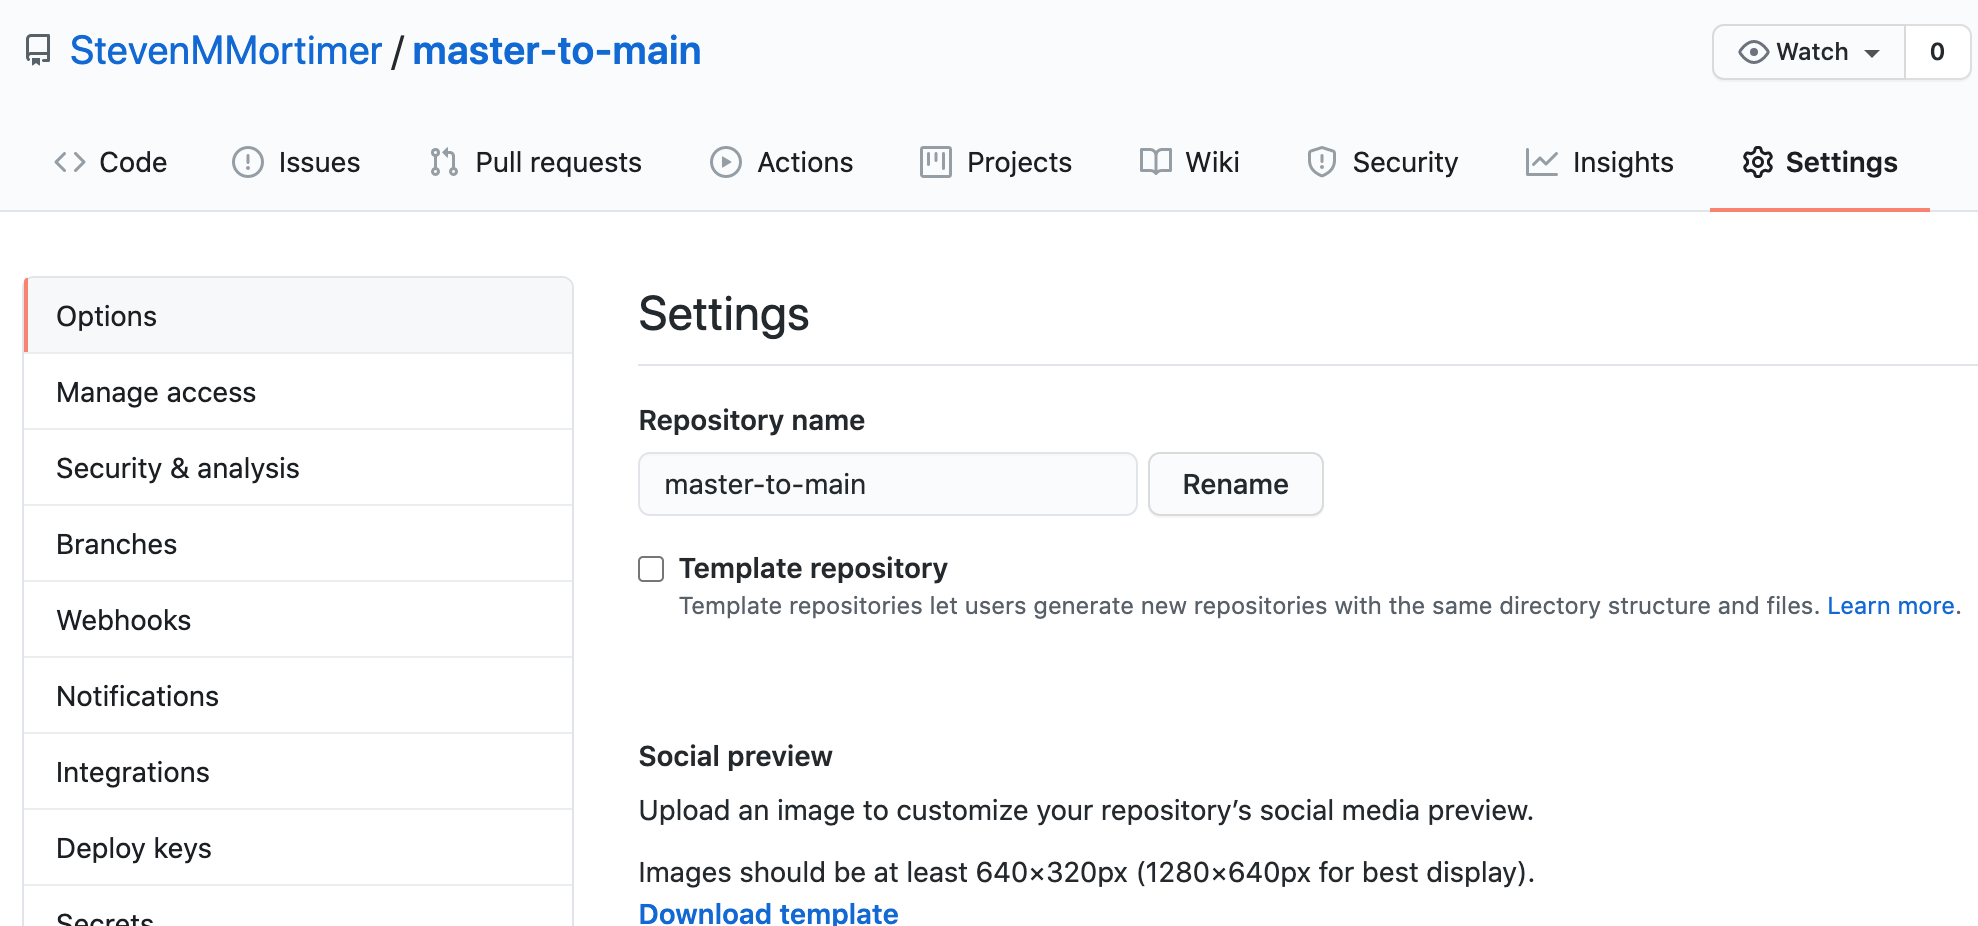
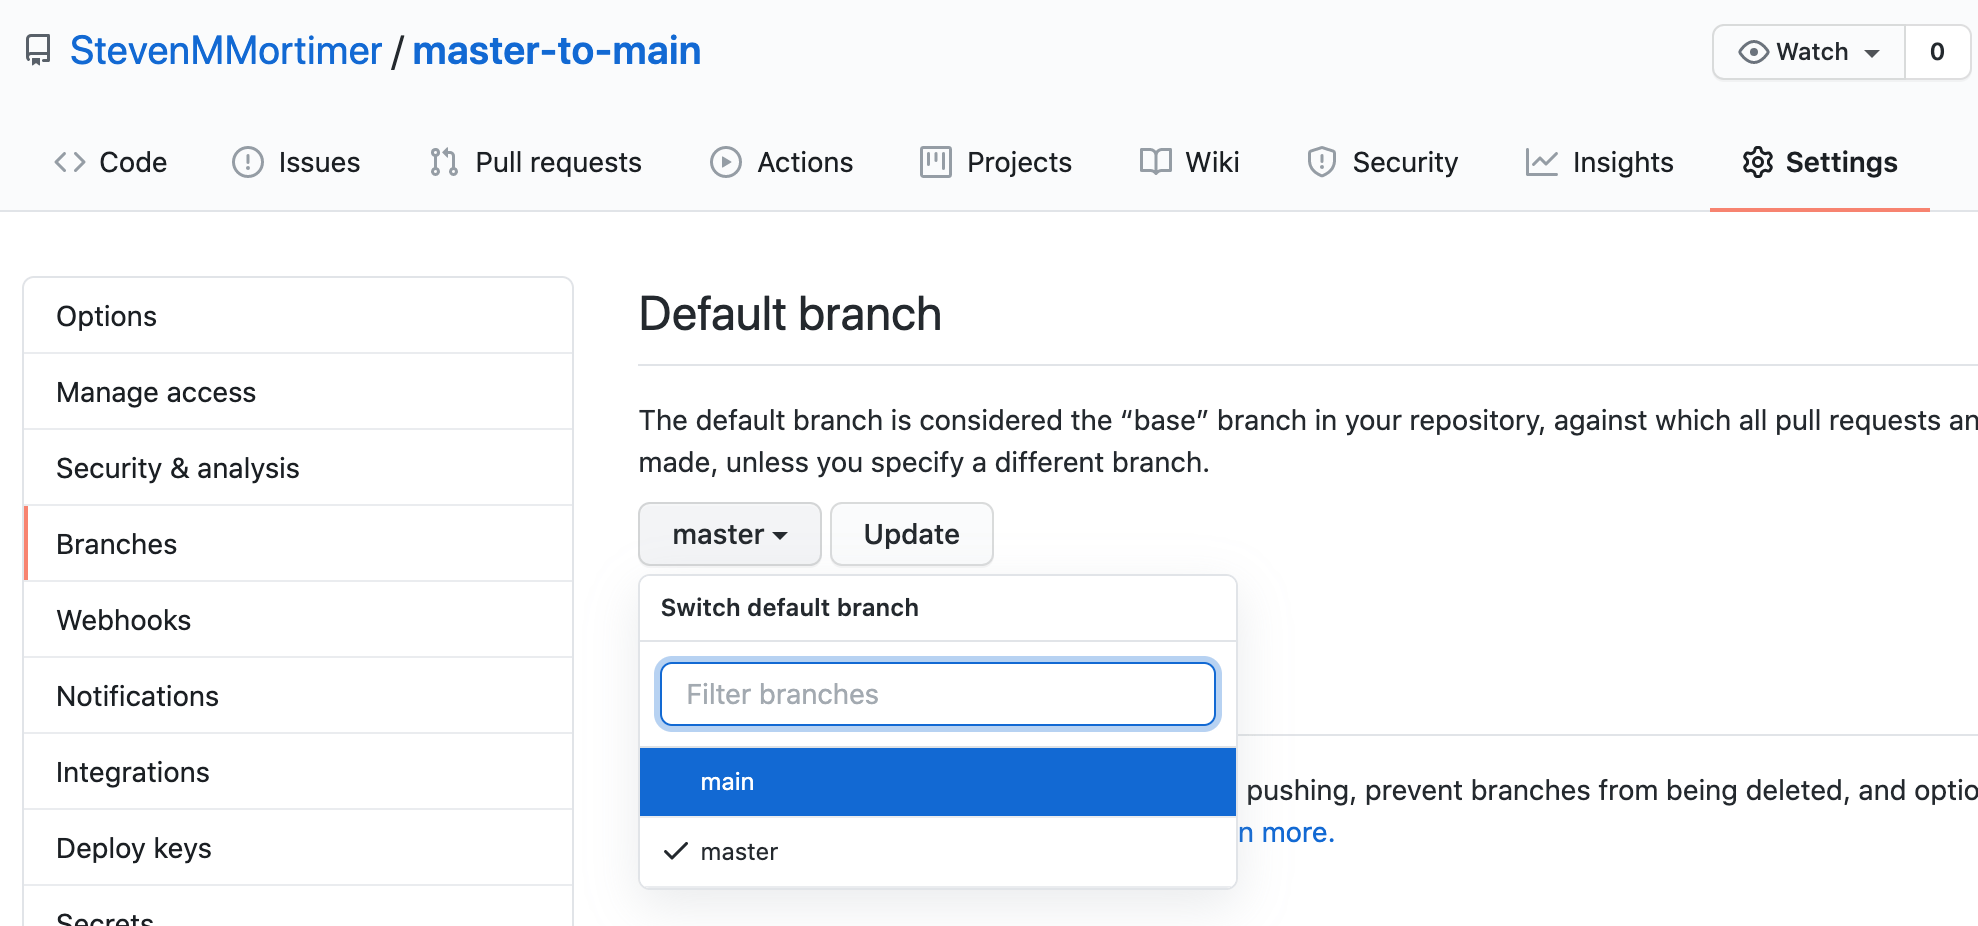
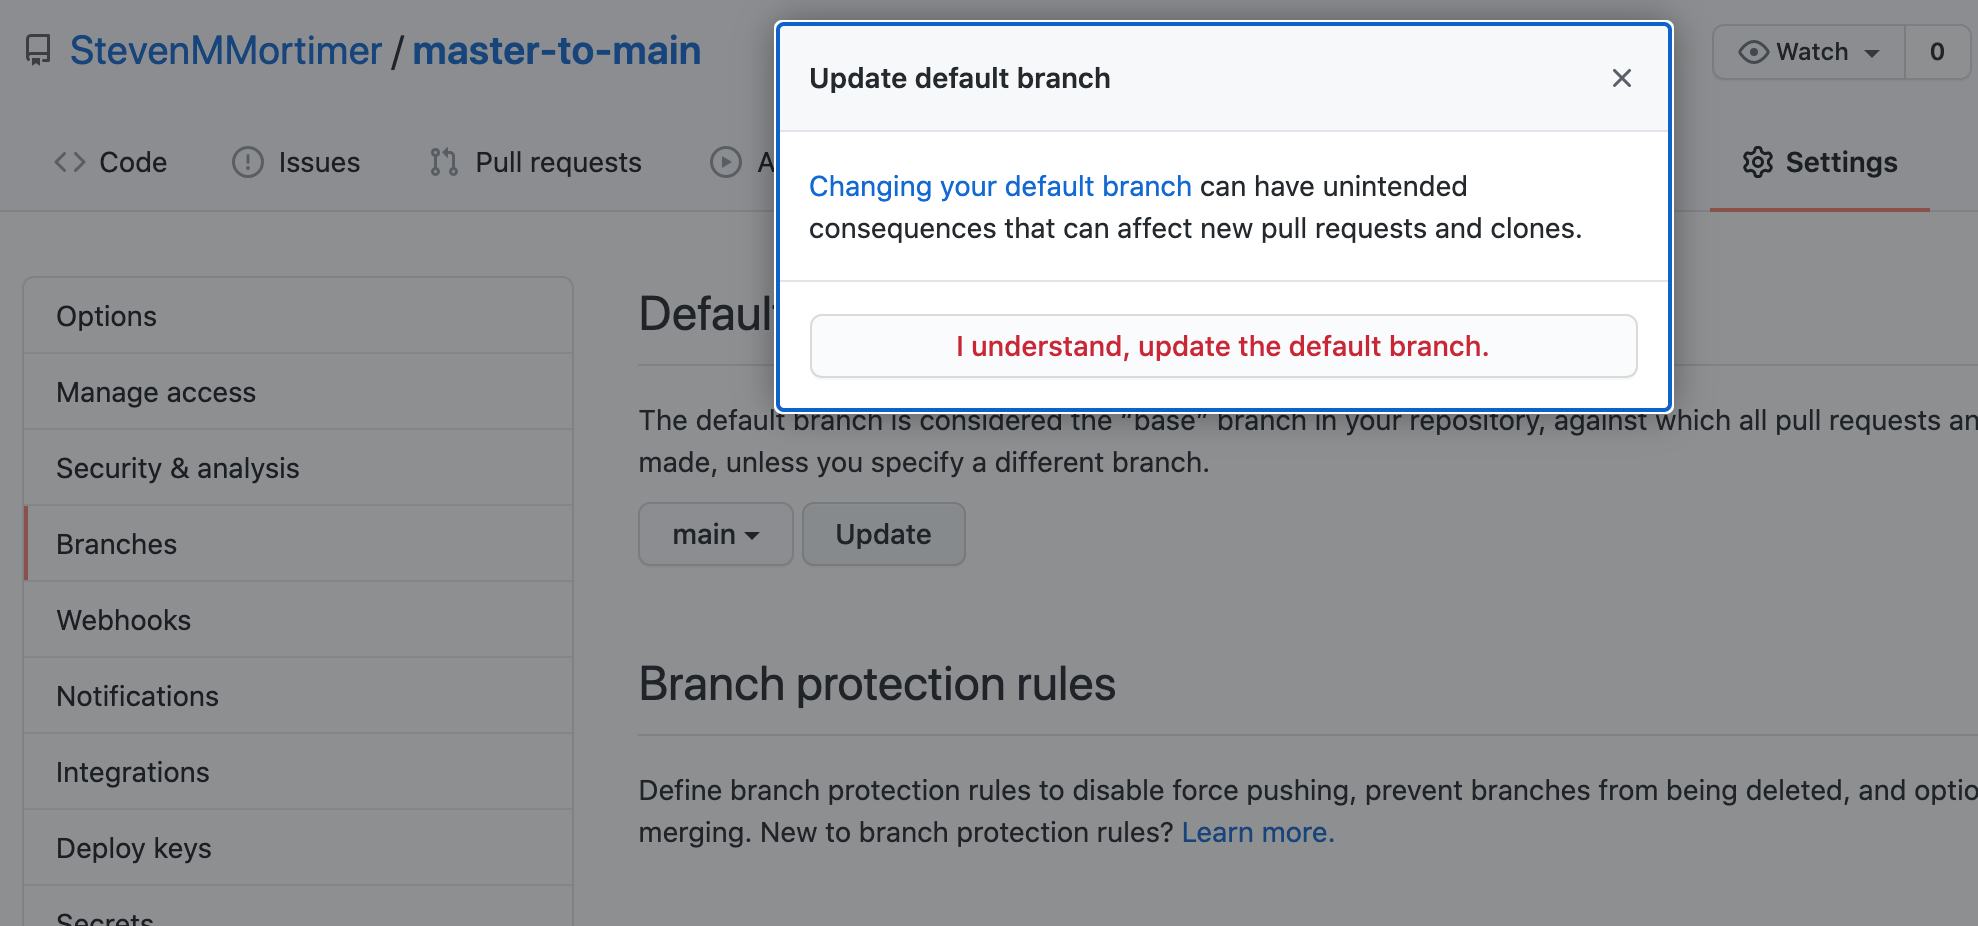
At this point you’ve succesfully transitioned everything to the ‘main’ branch, but you can’t delete the ‘master’ branch without changing the default branch in GitHub to something other than ‘master’. This is the only step that requires you to leave the Terminal and navigate in your browser to your GitHub repository. From there, click "Settings" -> "Branches" on the left rail and change the default branch to ‘main’. I’ve included some screenshots below and GitHub provides instructions for doing this here: https://docs.github.com/en/github/administering-a-repository/setting-the-default-branch.
Step 5 - Delete ‘master’ branch on the remote repo⚓
Now that the local ‘master’ is gone and there’s nothing pointing to it on Github you can delete it with the following command:

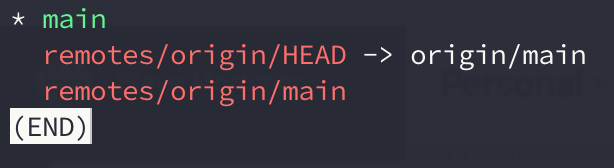
That’s it! You’re done! You should no longer see “master” or “remotes/origin/master” locally or on your GitHub repository. If you want to check, you can always run the following:
All commands⚓
# Step 1
# create main branch locally, taking the history from master
git branch -m master main

# Step 2
# push the new local main branch to the remote repo (GitHub)
git push -u origin main

# Step 3
# switch the current HEAD to the main branch
git symbolic-ref refs/remotes/origin/HEAD refs/remotes/origin/main

# Step 4
# change the default branch on GitHub to main
# https://docs.github.com/en/github/administering-a-repository/setting-the-default-branch

# Step 5
# delete the master branch on the remote
git push origin --delete master