Configure Cloudflare Access to Secure DigitalOcean Droplet⚓
Summary⚓
This article is a copy/paste from a Cloudflare Developer page. It details how to secure ssh access to a DigitalOcean droplet using Cloudflare Access and Argo Tunnel.
DigitalOcean SSH / Cloudflare Access⚓
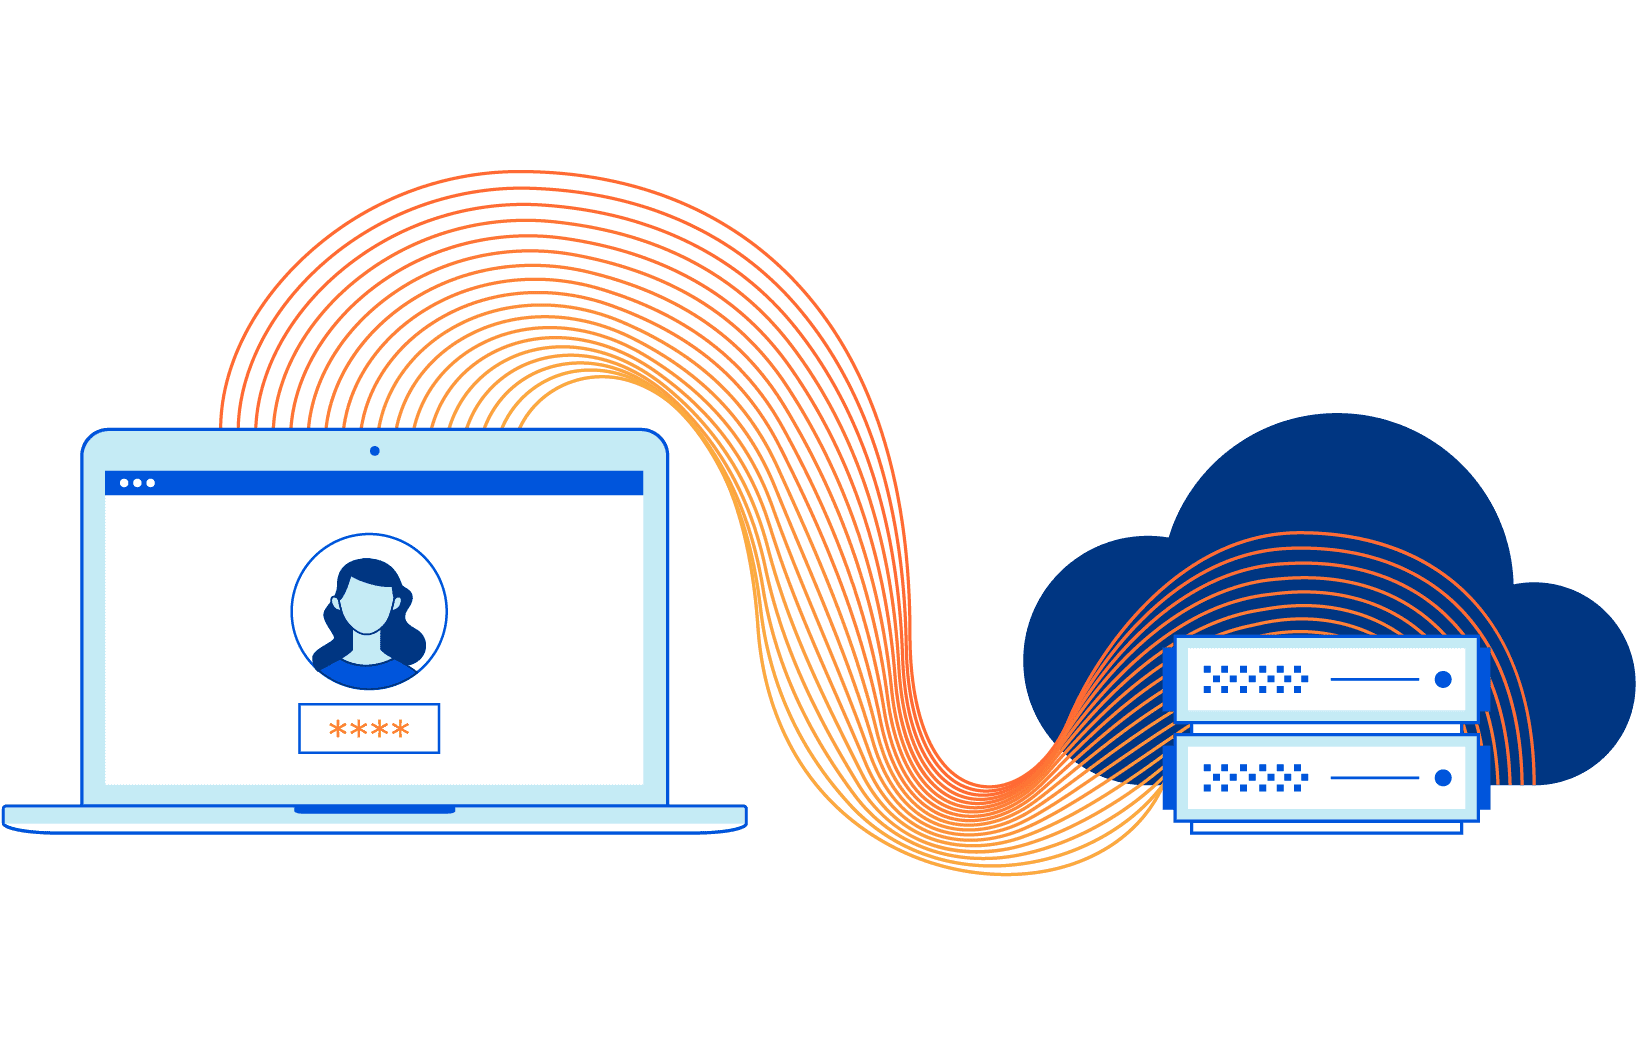
Cloudflare Access can secure servers in any infrastructure, on-premise, hybrid or public cloud, using your identity provider. Audit logs are gathered in a single, comprehensive place and users authenticate with the same SSO credentials they use for other services.
This tutorial will walk you through the steps of protecting a Digital Ocean droplet behind Cloudflare Access, enabling short-lived certificates for additional security, and connecting from a client device.
Create your droplet⚓
After you log in to your DigitalOcean account:
- On your DigitalOcean dashboard, click Create > Droplets.
The Create Droplets dialog displays.
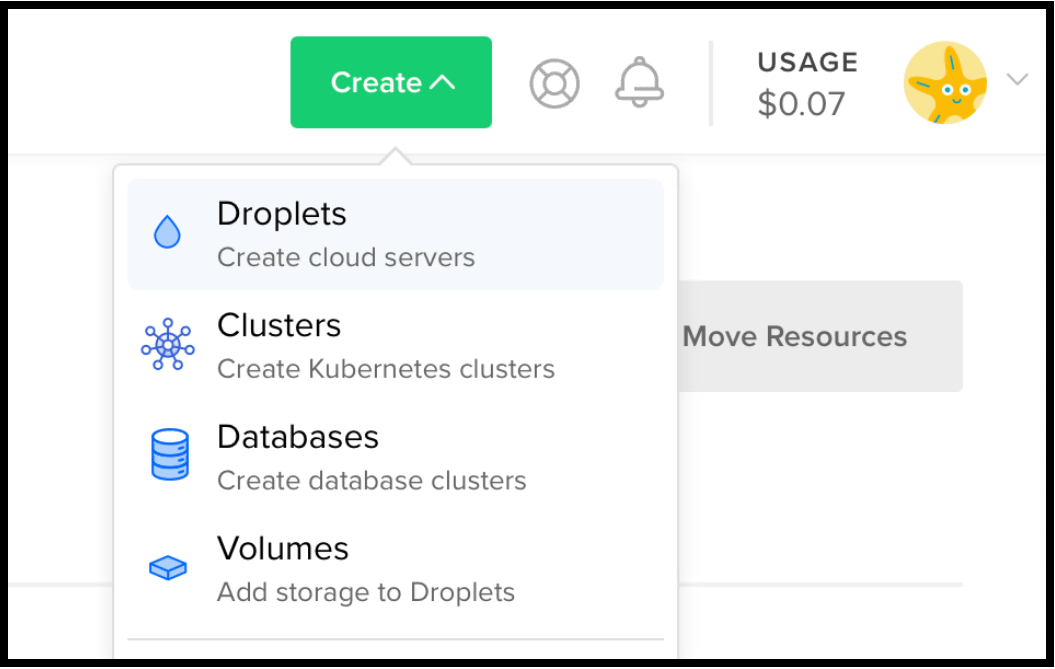
You can use a droplet of any size and a plan of any time. Cloudflare Access SSH has GA support for servers with x86, AMD64 and ARMv6 architectures. The instructions in this document use Ubuntu. You do not need to select additional options, such as Private Network or Add SSH keys to proceed.
- Click Create at the top-right of the Create Droplets window.
Configure your droplet⚓
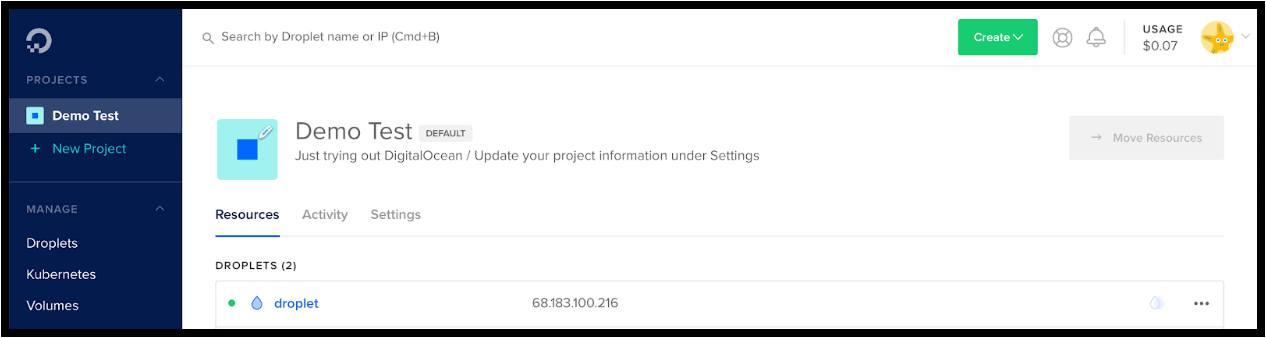
Once created, DigitalOcean provides a temporary public IP address to use to reach your droplet to configure Cloudflare Access. DigitalOcean sends you an email with the initial root password.
- Copy the password from the email and use the IP the following command:
Run the command from your local terminal, replacing the demo IP with the IP from DigitalOcean for your droplet.
The output confirms the SSH connection to your droplet.
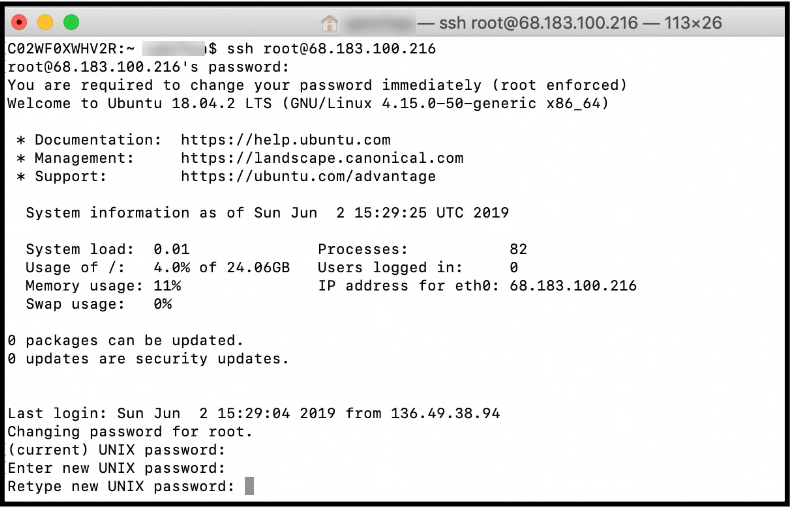
- In the root password field, paste the password sent in the DigitalOcean email.
- Complete the new password request.
- Securely save your new password.
Now, let's set up an Access policy.
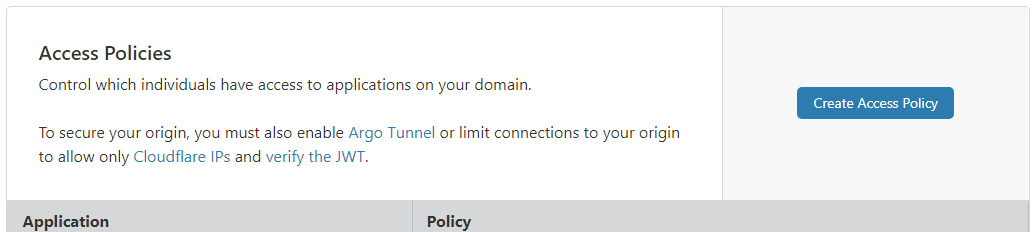
Create an Access policy⚓
Cloudflare Access controls who reaches your resource by evaluating every request made to that destination for authentication in the form of a JSON Web Token (JWT). Cloudflare generates this token based on a login event with the configured IdP.
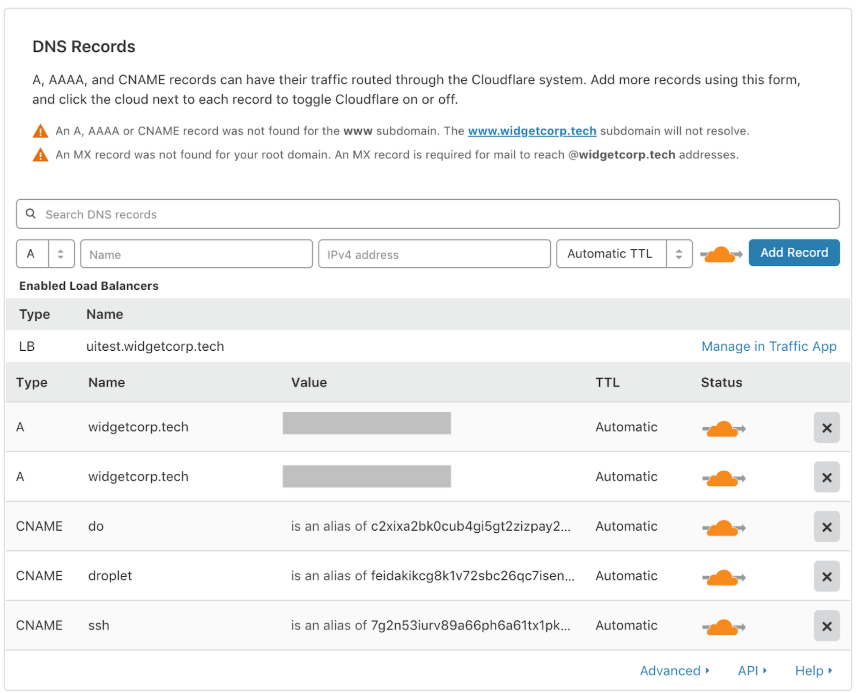
To use Access, you must have at least one registered domain using its authoritative Domain Name System (DNS) on Cloudflare. You can then generate subdomains to represent the resources protected by Access. We use the domain widgetcorp.tech in our example; the subdomain droplet.widgetcorp.tech represents the DigitalOcean droplet. You don’t need to configure DNS for that subdomain at this time.
To create an Access policy:
- Login to your Cloudflare dashboard and navigate to the Access app.
- In the Access Policies section, click Create Access Policy.
- Enter the subdomain that represents the resource to protect with Access. 4 (optional) Configure rules to allow members of your organization to reach this subdomain in the Policies section.
In our example, the policy allows anyone with an @cloudflare.com email address to reach the machine.
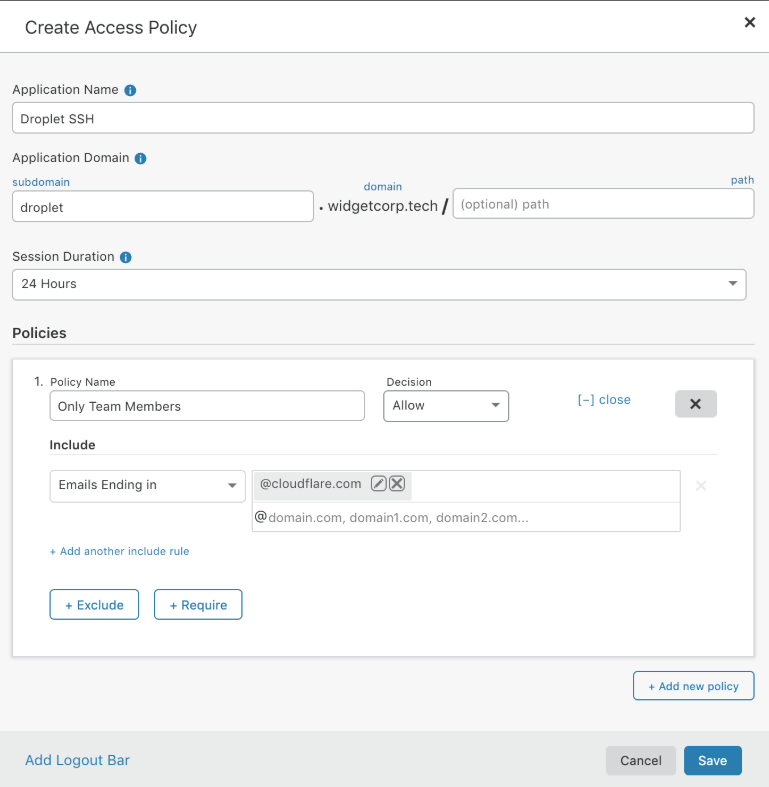
- Click Save.
Generate a certificate public key⚓
You generate a public key to validate certificates presented during the SSH session, and issue them to cloudflared.
Note
Your origin can use these short-lived certificates as an alternative to SSH keys for validating requests.
- On the Access app in your Cloudflare dashboard, navigate to the Short-Lived Certificates card.
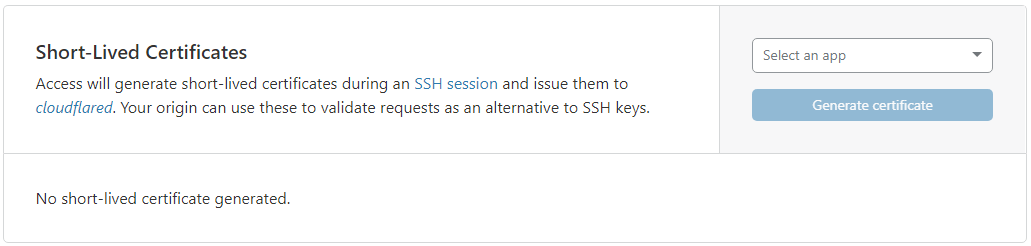
- Click the Select an app drop-down list and select the name of the application you created in from the drop-down menu.
- Click Generate certificate.
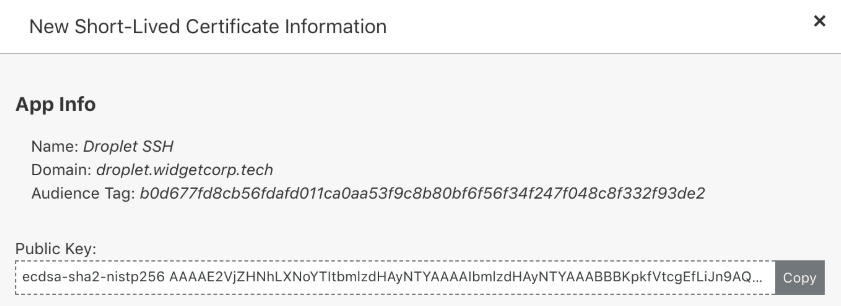
The new public key displays.
- Click Copy to place public key on your clipboard.
This public key is now always available on this page.
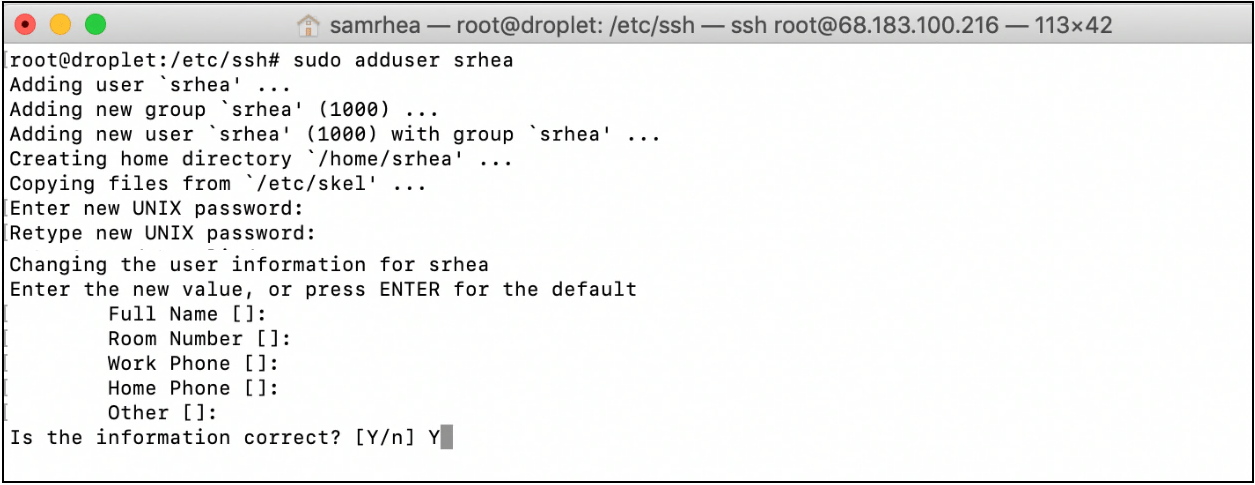
Match Unix usernames to SSO IDs⚓
Cloudflare Access takes the identity from a token and short-lived certificates to authorize the user. Access matches rely on the identity that precedes an email domain. For example, if the user identity in your Okta or GSuite IdP is [email protected], Access attempts to match that identity to the Unix user jdoe.
Return to the SSH session with your droplet to complete this step. Our example user is [email protected], which matches the Access policy because the identity belongs to the @cloudflare.com domain.
In a terminal window, issue the following command to ensure that a corresponding Unix user exists:
Save your public key⚓
Now we’ll save the public key previously generated by Access as a new PUB file on your system.
- In the terminal, change directories to the SSH configuration directory on the machine:
- Generate the file and open a text editor to input the public key:

- Ensure that you are in insert mode (
i) and paste the public key in the new file.
Important: Do not modify any other content.
- Save the file (
:wq).
Note
Command use may depend on your permissions. Some systems require this command to force save and quit:
Modify your SSHD Configuration⚓
Cloudflare Access requires two changes to the sshd_config file on the target machine. The first change requires uncommenting a field already set in most default configurations; the second change adds a new field.
To modify the sshd_config file:
- In the terminal window, stay in the
/etc/sshdirectory and open thesshd_configfile:
- Navigate to the
PubkeyAuthenticationrow.
In most default configurations, the row appears uncommented. This example shows it commented out using the hash ( # ) symbol:
- Enter insert (
i) mode, and delete the hash symbol to uncomment the line.
Info
Make no other changes.
- Insert this new line below
PubkeyAuthentication:
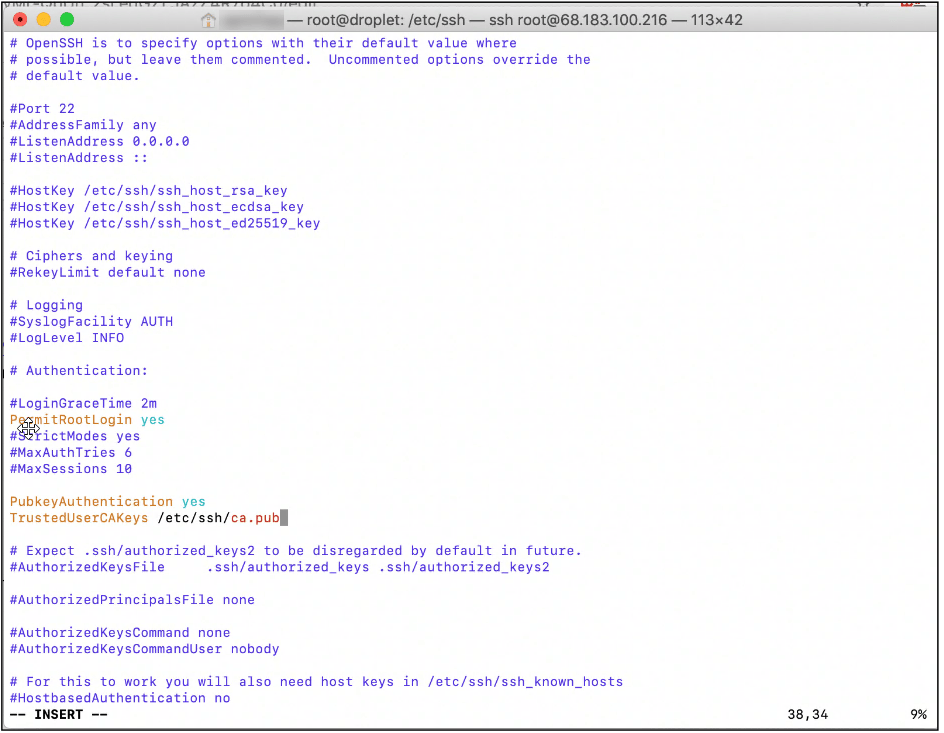
This adds the public key you previously saved to authorize users to your SSH configuration.
- Save the file (
:wq).
Note
Command use may depend on your permissions. Some systems require this command to force save and quit:
Restart the SSH server⚓
After modifying your SSHD configuration, restart the SSH service on the machine. Our example is for servers running systemd, as well as systemctl. Execute both commands:
Configure Argo Tunnel⚓
Argo Tunnel is a Cloudflare feature that uses a lightweight daemon, cloudflared, to securely connect your server to the Cloudflare network using only outbound calls. Each Argo Tunnel consists of multiple, highly available connections to at least two Cloudflare data centers.
Review these instructions for setting up Argo Tunnel.
Create Your Argo Tunnel⚓
You first create the subdomain that represents your machine. When Access authenticates a request, cloudflared proxies requests to that subdomain through the Cloudflare network to port 22 on the server.
Run the following command to create the Argo Tunnel and subdomain. You do not need to manually configure DNS records in the Cloudflare dashboard:
Note
This example uses a nohup prefix to keep the Argo Tunnel running after the session terminates. Production use cases may need to run cloudflared as a systemd process. Read more about running cloudflared in production environments in these guidelines. The output should resemble this:

You can confirm that the DNS record was created by visiting the DNS page in the Cloudflare dashboard for the domain.
Configure your Client SSH connection⚓
On the client side, follow the instructions in Connecting over SSH to configure the device to use Cloudflare Access to reach the protected machine. To use short-lived certificates, include the following settings in the SSH configuration file:
Host vm.example.com ProxyCommand bash -c '/usr/local/bin/cloudflared access ssh-gen --hostname %h; ssh -tt %[email protected] >&2 <&1' Host cfpipe-vm.example.com HostName vm.example.com ProxyCommand /usr/local/bin/cloudflared access ssh --hostname %h IdentityFile ~/.cloudflared/vm.example.com-cf_key CertificateFile ~/.cloudflared/vm.example.com-cf_key-cert.pub
You can save time by printing the configuration required for your specific instance with the following cloudflared command:
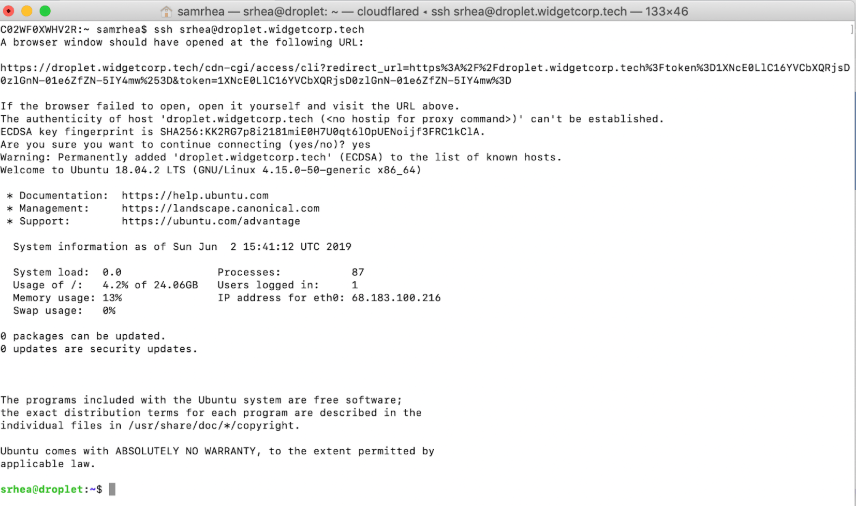
Test your SSH configuration by running this command from your local terminal:
cloudflared launches a browser window and prompts for authentication with your IdP. On success, Access generates a JWT (JSON Web Token) and a short-lived certificate, and authorizes the user into the server.
Lock down all ingress⚓
In this example, cloudflared only makes outgoing calls to the Cloudflare network for the droplet.widgetcorp.tech hostname. With that, you can restrict all ingress to the machine to secure the server in case the origin IP is ever exposed.
To lock down ingress in DigitalOcean:
- Select your droplet and pick Networking from the sidebar.

- Scroll to the bottom of the page and click Create Firewall.
- In the next screen, remove any rules that allow ingress to the server.
When no rules are listed DigitalOcean restricts all ingress. You must keep egress open.
- Select the droplet name where this rule applies, and click Create Firewall.
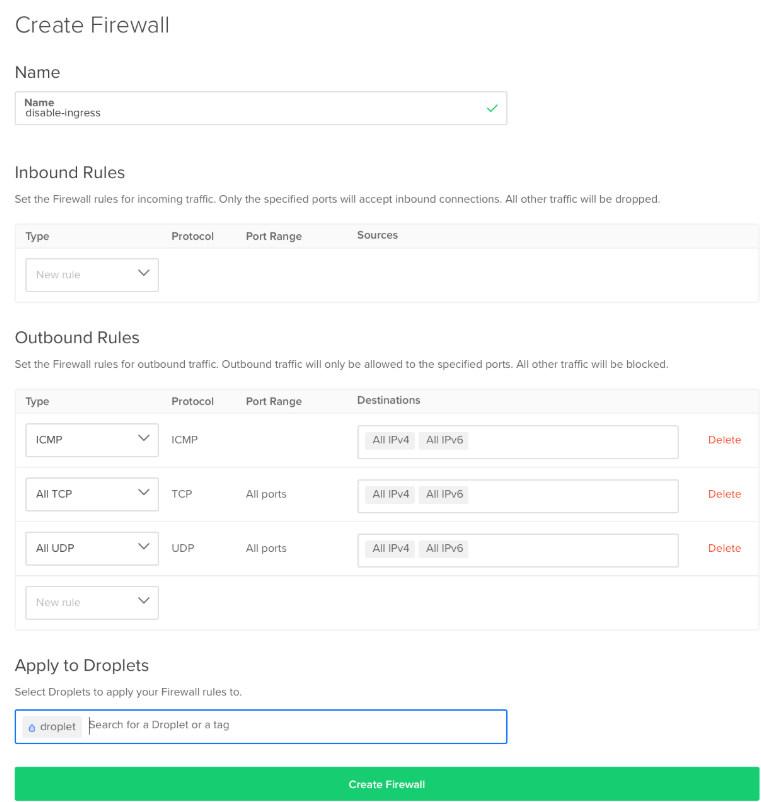
Ingress to the droplet is now locked down.